I have finally created a Facebook site! Click here to check it out. There, I will be posting pictures of events and jobs I've been working on and keeping you up to date with what's happening here at Doddy Photography! So, please take a moment to check it out and "Like" me there!
Thanks,
Monday, March 31, 2014
Wednesday, March 20, 2013
Travel Photography Class Offered!
I have my Travel Photography Class scheduled for 6 Wednesday's starting April 16th., 2014 - from 7 ~ 9pm., held at the Palisades High School in Kintnersville, PA.
I need a minimum number of participants, so either sign up or pass this information along! Go to my website here for more information!
Hope to see you there!
I need a minimum number of participants, so either sign up or pass this information along! Go to my website here for more information!
Hope to see you there!
Wednesday, August 29, 2012
GEO Tagging Your Images
GEO tagging images is a way of using GPS coordinates to create a reference point on a map where the photograph was taken. This can be used with e-mailed images or blogs, where I'm concentrating my efforts for now.
I have been researching this topic for some time trying to find a quick and easy way to make this happen. After much research, I have found lots of somewhat useless information. Most people that have articles about it make it seem quit simple. I haven't found this to be true. As a matter of fact, I have found it to be very confusing and difficult. I want to GEO Tag photographs for several reasons; most people I have talked to really like the idea, I want to teach it in my Travel Photography Class, and last, I've been asked to provide this service to some of my clients.
I have found that there are several ways of getting the GPS coordinates needed. The first and easiest is to have a camera with a built in GPS receiver which will do the work for you. Next is to use a data logger, which I don't have yet, and last, the very time consuming way - using several programs to generate the GPS information needed for the images. The free program I'm using is called GeoSetter.
I have also found an app for Android phones called "Geotag Photos Pro" that will track your location(s) and create a file that you upload to their website. You then create a login for retreiving your data to sync to your images. The trick with this app is to make sure your camera time is precisely synced to your phone, which the app will help you do. This is good for short trips where you have a few images you need to tag.
These images below were done the hard way. Since these were taken several years ago, I wanted to see if and how I could link them. Some of the problems I have noticed, when you click on "Google Map Link", some of them will place a marker on the map and others don't. At this point, I'm not sure why but I do prefer to have the markers. The idea is to pinpoint where you were, the whole object of GEO tagging! I also want the map to be zoomed in closer to the area where the photograph was taken - working on that as well.


I will admit, knowing more about this topic now, I will be using a data logger for my trips in the future. This will eliminate several time consuming steps.
As I continue my research on this topic, I will edit and add more.
Wednesday, May 9, 2012
Composition - Rules or No Rules!
In many of my photography classes I talk about the "Rules of the Thirds" as an important composition lesson. But if you have taken my classes, you'll recall I had mentioned that rules are meant to be broken! In this article, I've included images to back up my lecture and show some of the ways the Rules of Thirds gets used and misused. I chose the following images because some are good and some, well, not so good.
Many times I get caught up in the subject, forget my professional training, and fire away. Then, I look back and ask myself, what was I thinking!
This is how we learn, especially me!
When I first started in photography there no such thing as digital cameras, just rolls of 36 exposure film. Remember those days?? You learned good exposure and composition skills quickly because it cost you to goof up. You didn't know if you've done poorly or well until the previews came back. Now, we just let her rip at no cost and see the results instantly, and for the most part plan on editing back in the studio. I for one, need to slow down and check my composition, and you can learn from all my years of trial-and-error!
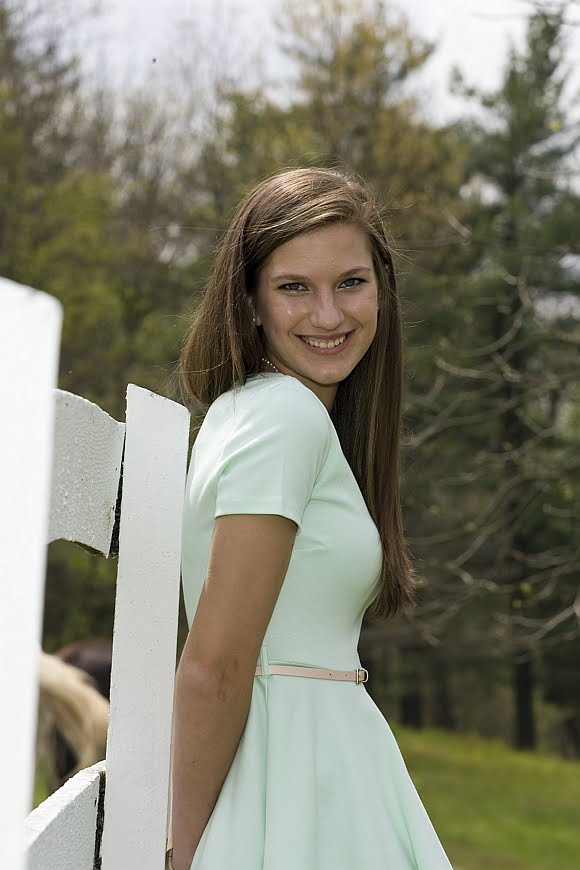
The subjects of this post are of a recent trip my wife and I took to visit our daughter and her family in North Caroline and the senior portraits of a close friend. I think you'll be able to tell the difference.
OK, so what are the rules of the thirds you ask? If you remember tic tac toe, two horizontal lines and two vertical lines, you are familiar with this simple grid. When placed over an image, the tic-tac-toe board divides an image into thirds vertically and horizonally. We use these intersection points or the lines of the thirds for compositional placement. In the first image and several others I've placed a grid to show where the intersection points are located. Notice the subjects are located at or close to the intersections of composition.


Next, with two subjects that are not in the thirds land marks you need to choose a primary and secondary. In this case I've placed Sarah in the thirds. As a bonus tip, note that both subjects are to the left looking into the photograph as opposed to coming in tight from the right of DJ and having them look out. Always allow that space in your composition.

In this next image, notice how Beccah is on the left third vertically but centered horizonally. Here again I choose to place her that way and bend the rules! If I would have created this with her on an intersecting point, there would be too much dead area either on the top or bottom of the image. Sometimes you have to make the call.

In this next one, the client wanted the sign of the bridge as part of the composition. I had to use a low camera angle to make this work and place both her and the sign in the oposing intersection points!

I think it worked!

As with the first image of Beccah, I chose to center her vertically and do the thirds from the top.

OK, so here is where I didn't do so good. In this image below, I was trying to incorporate some compositional elements by including the pink Dogwood but it didn't work. The branches were too high and I ended up composing her dead center to include them. I had a ladder that I didn't use to get higher. The angle would have put the branches where I needed them and placed her in the upper third.


The next two images held a special challange, and you must remember when working with kids you only have about three seconds to compose and create your image. Now, to make the first image better, I should have come in closer and balanced DJ and the hub (center hole of the propeller) on the vertical thirds. I can still do that post processing, but again, if you don't have editing software, you can't do that, so, compose behind the lens!!!
The second image: No other way of composing this one - Break the rules! Notice how the blades lead you to that cute face! One of my challanges of that weekend with the kids was to compose an image with DJ smiling! He's a tough one to catch! Of the many we have, less than 1% of them have a smile.


This next two were lucky catches. You know how kids are. Do these work being centered? Your call, let me know!


In this one, again, I think because of the composition around DJ, centering was the only way to go.

This last one is a bonus, leading lines. Notice how it draws you in, shame it was such an overcast day!

Remember, weather you are taking candids while traveling on vacation or doing work for a client, composition matters! Take the time to compose behind the lens, and ask yourself if the rules of the thirds matter. You are the artist; you really can do what you want, but make sure you have a good reason. Until next time, keep that camrea with you!
Many times I get caught up in the subject, forget my professional training, and fire away. Then, I look back and ask myself, what was I thinking!
This is how we learn, especially me!
When I first started in photography there no such thing as digital cameras, just rolls of 36 exposure film. Remember those days?? You learned good exposure and composition skills quickly because it cost you to goof up. You didn't know if you've done poorly or well until the previews came back. Now, we just let her rip at no cost and see the results instantly, and for the most part plan on editing back in the studio. I for one, need to slow down and check my composition, and you can learn from all my years of trial-and-error!
The subjects of this post are of a recent trip my wife and I took to visit our daughter and her family in North Caroline and the senior portraits of a close friend. I think you'll be able to tell the difference.
OK, so what are the rules of the thirds you ask? If you remember tic tac toe, two horizontal lines and two vertical lines, you are familiar with this simple grid. When placed over an image, the tic-tac-toe board divides an image into thirds vertically and horizonally. We use these intersection points or the lines of the thirds for compositional placement. In the first image and several others I've placed a grid to show where the intersection points are located. Notice the subjects are located at or close to the intersections of composition.


Next, with two subjects that are not in the thirds land marks you need to choose a primary and secondary. In this case I've placed Sarah in the thirds. As a bonus tip, note that both subjects are to the left looking into the photograph as opposed to coming in tight from the right of DJ and having them look out. Always allow that space in your composition.

In this next image, notice how Beccah is on the left third vertically but centered horizonally. Here again I choose to place her that way and bend the rules! If I would have created this with her on an intersecting point, there would be too much dead area either on the top or bottom of the image. Sometimes you have to make the call.

In this next one, the client wanted the sign of the bridge as part of the composition. I had to use a low camera angle to make this work and place both her and the sign in the oposing intersection points!

I think it worked!

As with the first image of Beccah, I chose to center her vertically and do the thirds from the top.
OK, so here is where I didn't do so good. In this image below, I was trying to incorporate some compositional elements by including the pink Dogwood but it didn't work. The branches were too high and I ended up composing her dead center to include them. I had a ladder that I didn't use to get higher. The angle would have put the branches where I needed them and placed her in the upper third.


The next two images held a special challange, and you must remember when working with kids you only have about three seconds to compose and create your image. Now, to make the first image better, I should have come in closer and balanced DJ and the hub (center hole of the propeller) on the vertical thirds. I can still do that post processing, but again, if you don't have editing software, you can't do that, so, compose behind the lens!!!
The second image: No other way of composing this one - Break the rules! Notice how the blades lead you to that cute face! One of my challanges of that weekend with the kids was to compose an image with DJ smiling! He's a tough one to catch! Of the many we have, less than 1% of them have a smile.


This next two were lucky catches. You know how kids are. Do these work being centered? Your call, let me know!


In this one, again, I think because of the composition around DJ, centering was the only way to go.

This last one is a bonus, leading lines. Notice how it draws you in, shame it was such an overcast day!

Remember, weather you are taking candids while traveling on vacation or doing work for a client, composition matters! Take the time to compose behind the lens, and ask yourself if the rules of the thirds matter. You are the artist; you really can do what you want, but make sure you have a good reason. Until next time, keep that camrea with you!
Sunday, March 4, 2012
Cooking Classes with a Former Student
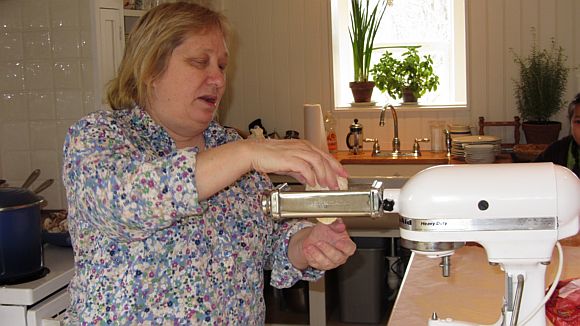
On Saturday, March 3rd, Deb and I were invited as guests to a cooking class on "Homemade Pasta" which was put on by a former student of mine from my night classes - Sheila McDuffie. She runs "The Kitchen Country Cooking School", located in the Upper Bucks County area.
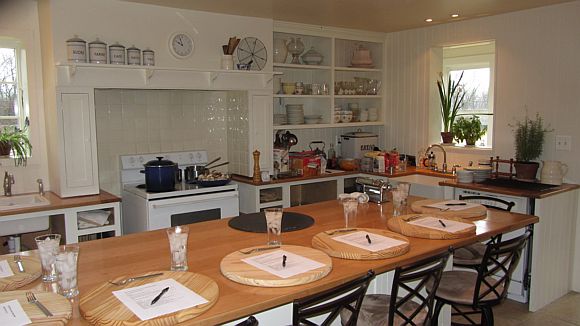
Classes are small, only 6 of us. Each person had their own work area around this beautiful hand made table; made by her husband. After a short demo, we were each given flour and 2 eggs, then dug in! In a few minutes, we each had a ball of dough to start making pasta.
This first image is the kitchen where our class was held - a typical beautiful county farm house style.
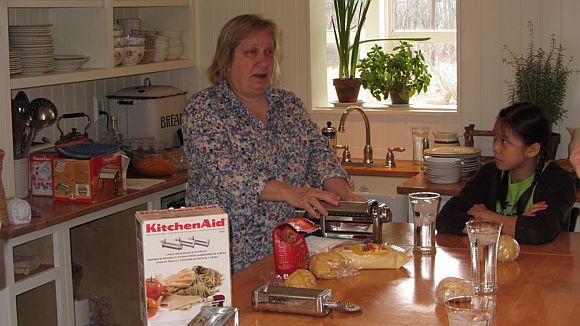
Next, is Sheila and one of her youngest students, Olivia!
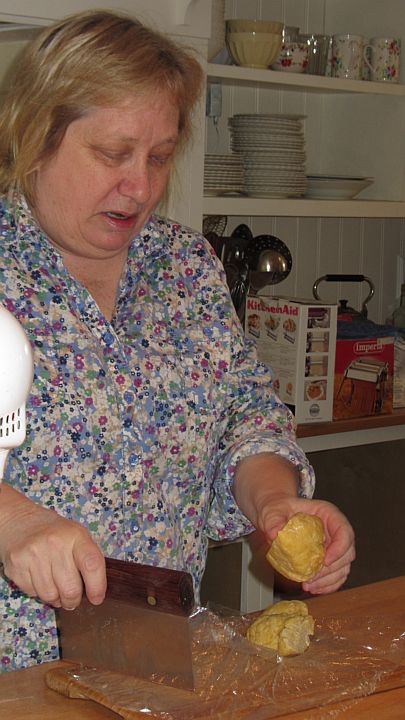
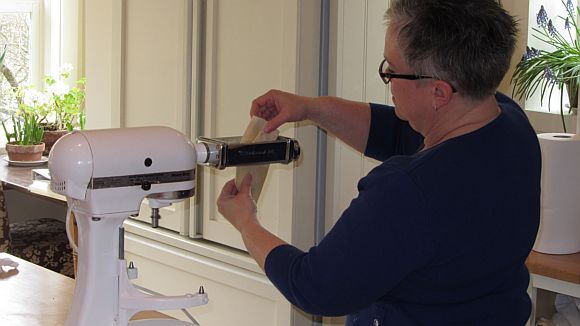
Next, she is demonstrating how to prepare the dough that will run through the pasta maker as seen in the following image.
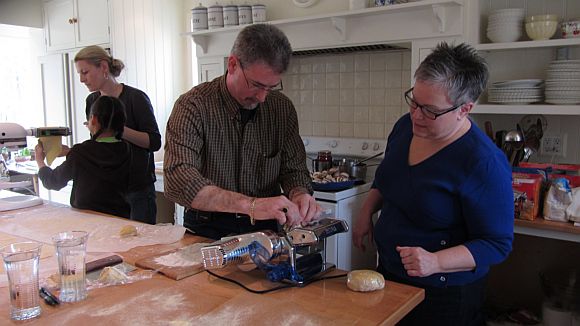
The next set of images are Deb and me digging in!

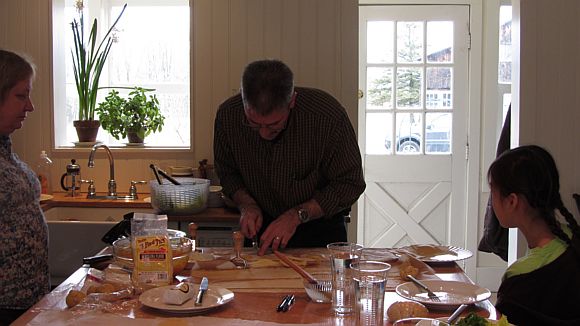
By the end of the class, everyone that didn't eat what they made, went home with either fettuccini, ravioli or both! I had my fettuccini and was impressed - if I must say so. Even Deb liked it!
When we have the opportunity to do so, we are going to take another class! We had a great time and really learned quit a lot! Of course, we need to invest in the attachments for our mixer.
Click Here to visit Sheila's website! Also, go to her blog and sign on, she needs lots of hits to be concidered for publishing her first cookbook!
Classes are small, only 6 of us. Each person had their own work area around this beautiful hand made table; made by her husband. After a short demo, we were each given flour and 2 eggs, then dug in! In a few minutes, we each had a ball of dough to start making pasta.
This first image is the kitchen where our class was held - a typical beautiful county farm house style.

Next, is Sheila and one of her youngest students, Olivia!

Next, she is demonstrating how to prepare the dough that will run through the pasta maker as seen in the following image.


The next set of images are Deb and me digging in!


By the end of the class, everyone that didn't eat what they made, went home with either fettuccini, ravioli or both! I had my fettuccini and was impressed - if I must say so. Even Deb liked it!
When we have the opportunity to do so, we are going to take another class! We had a great time and really learned quit a lot! Of course, we need to invest in the attachments for our mixer.
Click Here to visit Sheila's website! Also, go to her blog and sign on, she needs lots of hits to be concidered for publishing her first cookbook!
Thursday, March 31, 2011
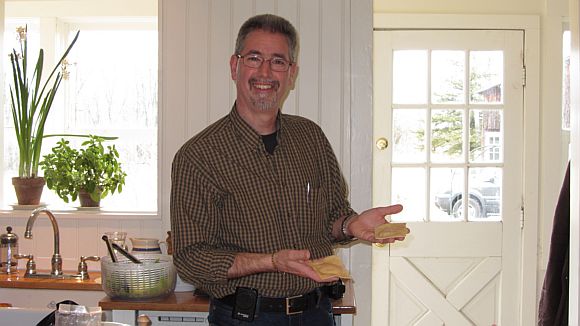
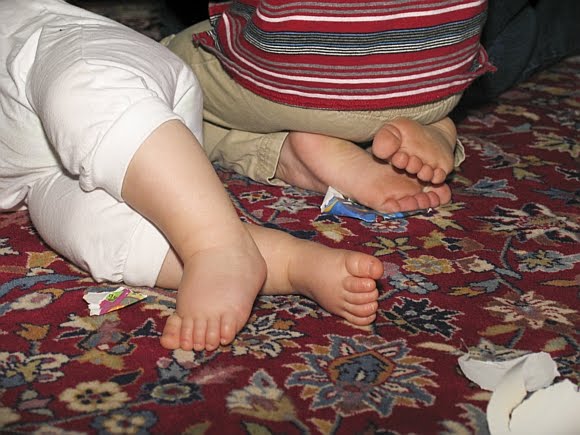
Get down to their level!
When we are doing candid photographs of family and friend, we are usually standing and chatting while taking pictures. This is common because we are at the same level as the people we are conversing with. Rarely are you standing on a tall ladder or asking everyone to sit on a chair while we stand on a table to photograph them.
If you have ever gone to have an executive or even a passport photogaph taken, you will see the photographer is just slightly above your eye level with the camera.
When you go to an art museum to look at paintings or photography you will see most of the pieces are hung at our eye level. Even the artwork we hang in our homes is at eye level also.
So why then with children and even our pets do we hesitate to do the same? Is it the fear of getting more exercise, hurting our backs or are we just complacent? Even I forget from time to time to stop and realize what my subject is.
With children, they are much lower than we are, either lying on the floor, or just standing at their height. In order to get a more pleasing image of these little tykes, we should be photographing at a lower level. This, of course, can be at the artist discretion!
Below are some examples -
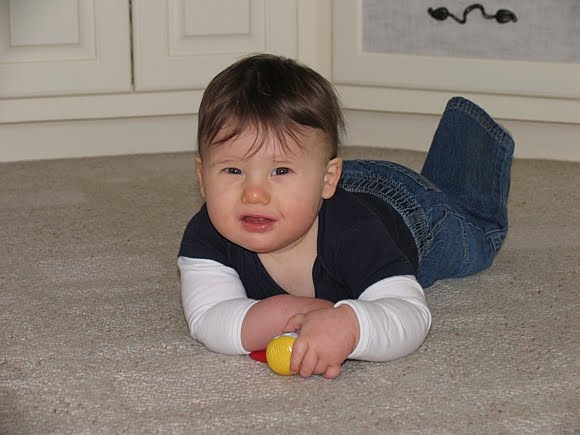
Don't just bend over, lay down if you need to! As you can see in some of these examples, I'm laying on the carpet!
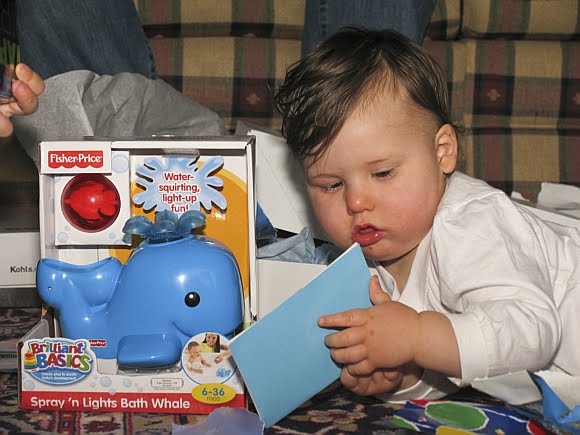
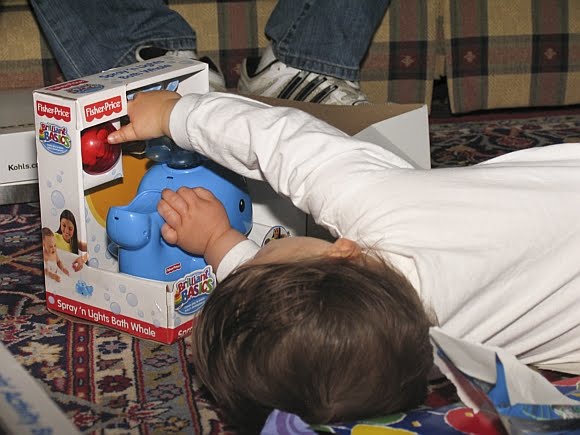
And don't forget to get the interesting photographs, like this one ---

Try this and see for yourself - separate yourself from the others who just "snap away"! You may find things are more interesting down here - the perspective is different if you just "Get down to their level"!
If you have ever gone to have an executive or even a passport photogaph taken, you will see the photographer is just slightly above your eye level with the camera.
When you go to an art museum to look at paintings or photography you will see most of the pieces are hung at our eye level. Even the artwork we hang in our homes is at eye level also.
So why then with children and even our pets do we hesitate to do the same? Is it the fear of getting more exercise, hurting our backs or are we just complacent? Even I forget from time to time to stop and realize what my subject is.
With children, they are much lower than we are, either lying on the floor, or just standing at their height. In order to get a more pleasing image of these little tykes, we should be photographing at a lower level. This, of course, can be at the artist discretion!
Below are some examples -

Don't just bend over, lay down if you need to! As you can see in some of these examples, I'm laying on the carpet!


And don't forget to get the interesting photographs, like this one ---
Try this and see for yourself - separate yourself from the others who just "snap away"! You may find things are more interesting down here - the perspective is different if you just "Get down to their level"!
Friday, March 11, 2011
Testing a Video Clip
This is my first time doing a small video here. I'm doing this test because we are ttraveling to Italy again this year and I want to do short video intros to the segments I post.
This first one is a conversion of a slide show.
So, bare with me as I do some of the tests to get it right! Thanks!
This first one is a conversion of a slide show.
So, bare with me as I do some of the tests to get it right! Thanks!
Tuesday, January 18, 2011
Winter Time - Keep Warm and Dry!
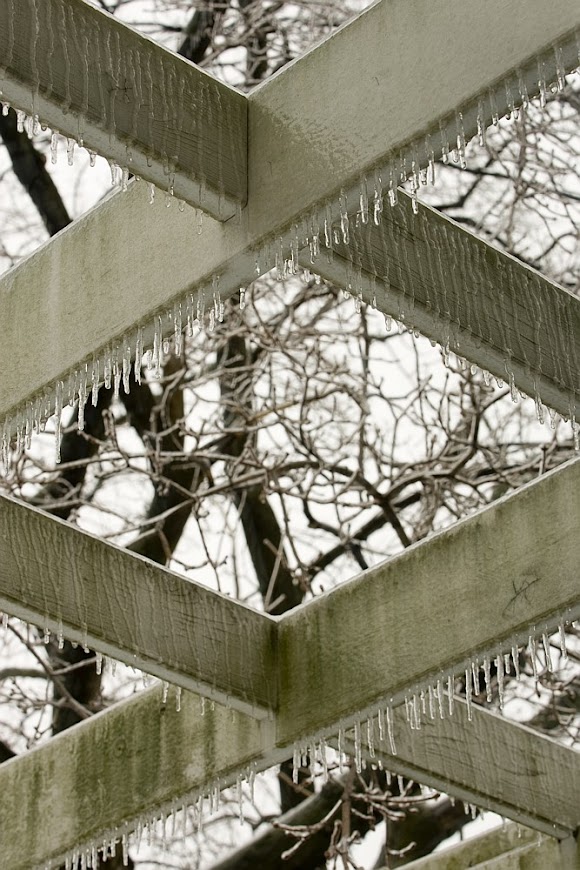
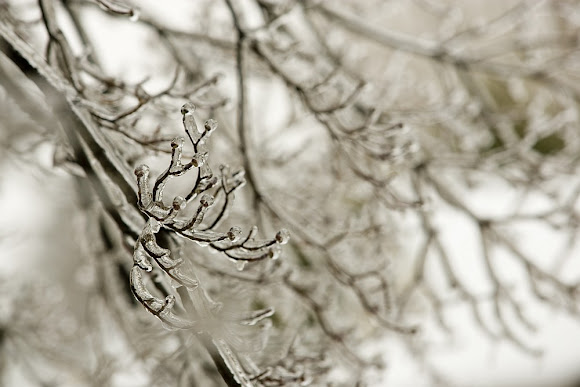
Here is the Northeast, we get a chance to enjoy beautiful snowfalls, however, occasionally, these beautiful winter marvals turn into an icy mess as did this past week. but, as photographers, we need to take advantage of natures wonders!
Here are some images taken of our back yard! The first is our weeping Apple tree. I have found that most of my ice scenary images are best taken during or just after the storm with heavy overcast. I've done some in bright sunlight and I wasn't happy with my results - I need to practice more!!!

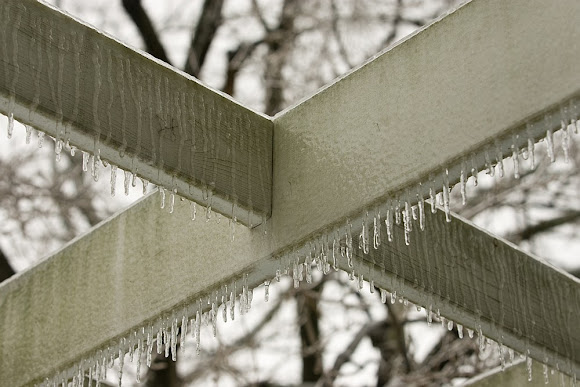
This below is our pergola!
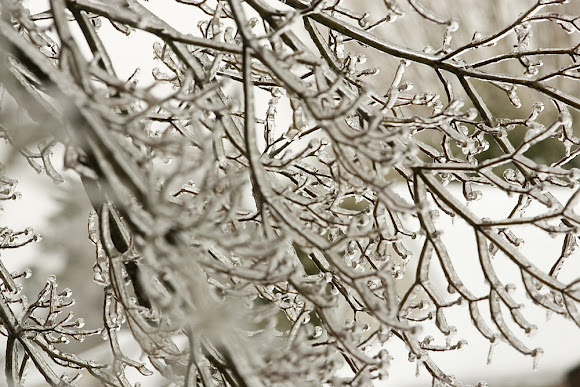
These below are our Dogwood tree in the front yard - note some shallow depth focusing on either the front or the back of the image.

And last, our hand made (by my father) bird house!
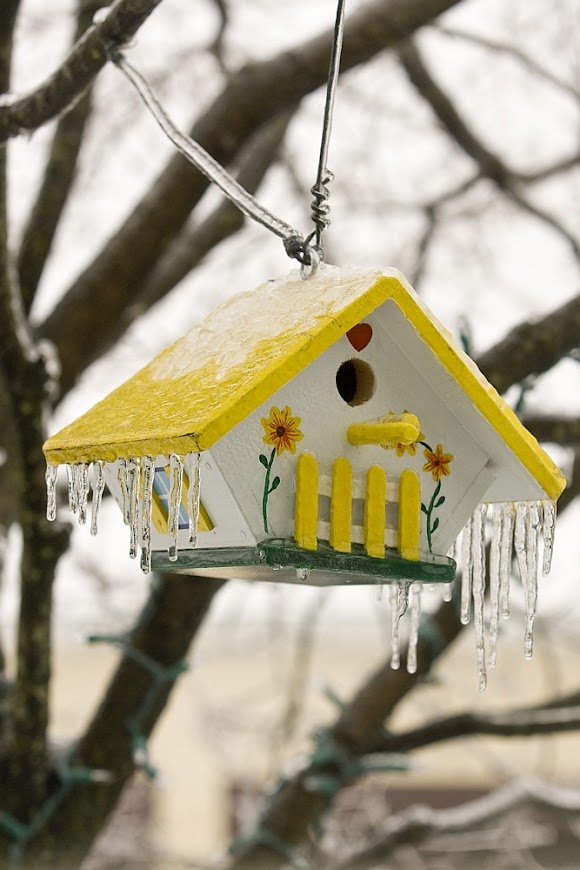
Remember, for outdoor wintertime photography, keep both you and your camera warm and dry. These images were taken from inside our home, lucky for me on this one!
So, don't let bad weather spoil your fun - take advantage of what mother nature brings to us and capture her beauty!
Here are some images taken of our back yard! The first is our weeping Apple tree. I have found that most of my ice scenary images are best taken during or just after the storm with heavy overcast. I've done some in bright sunlight and I wasn't happy with my results - I need to practice more!!!

This below is our pergola!


These below are our Dogwood tree in the front yard - note some shallow depth focusing on either the front or the back of the image.


And last, our hand made (by my father) bird house!

Remember, for outdoor wintertime photography, keep both you and your camera warm and dry. These images were taken from inside our home, lucky for me on this one!
So, don't let bad weather spoil your fun - take advantage of what mother nature brings to us and capture her beauty!
Thursday, November 18, 2010
Good Weekend For Aerials
I picked up a new client and while on assignment to photograph his location, we flew over a local park in our area. My wife suggested that it would be neat to see this park empty! So below is a photograph of Dorney Park and below that is my client's site.
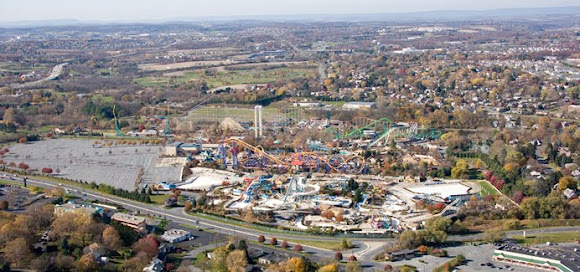
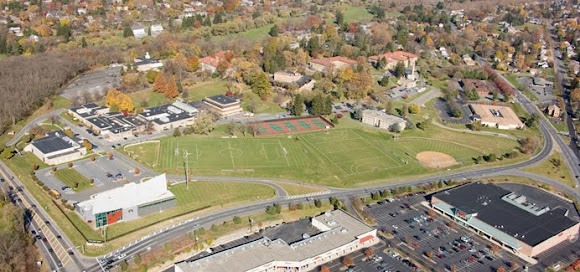
I really enjoy doing aerials of the Lehigh Valley because I know the area and I get to see a different perspective of the land, buildings and the beauty. If you ever get a chance to fly over the area you live, take the time and your camera and enjoy. Words can't discribe, pictures sometimes can!
As I get the oppertunity to do more, I will post images for everyone to enjoy!
Thursday, October 7, 2010
Travel Photography Class
Starting Tuesday, October 12th, I will be teaching my first "Travel Photography" class. I'm looking forward to it. I hope to learn as much as I will be teaching because this topic can go on forever! I will be applying what I've learned and what I've researched and also tips and pointers from some of my past students, one in particular who is a world traveler. I've learned from him as well - thanks Larry!
My wife and I have been to Canada and Italy one time each so far, planning another trip to Italy in October of 2011. We have done some domestic traveling as most of you have, both by car and air, and the challanges between the two are so different. Overseas is an even greater challange as everyone is well aware of. For me, I want to take all of my camera equipment, but, you just can't. That's when you learn to be more creative, composing beautiful images with less!
I hope the class goes well and we all learn! I've spent many hours preparing and creating the PowerPoint. The critiques will tell-------
Subscribe to:
Posts (Atom)